

How To Draw In Microsoft Word 2016
Word for Microsoft 365 Give-and-take 2021 Give-and-take 2019 Give-and-take 2016 Word 2013 Word 2010 Word 2007 More...Less
These are the basic types of graphics that you can use to heighten your Give-and-take documents: drawing objects, SmartArt, charts, pictures, and clip art. Drawings refer to a drawing object or a grouping of drawing objects.
Cartoon objects include shapes, diagrams, flowcharts, curves, lines, and WordArt. These objects are part of your Word document. You tin modify and enhance these objects with colors, patterns, borders, and other effects.
Notation:It is no longer necessary to insert a drawing canvas to work with cartoon objects in Word. Still, you may still use a drawing canvas as an organizational aid when working with several drawing objects, or if y'all want to add connectors between shapes. To insert a drawing sail, on the Insert tab, click Shapes, and then click New Drawing Canvas.
What do you lot want to practice?
-
Add a drawing to a document
-
Delete all or part of a drawing
Add a drawing to a document
-
Click in your document where yous want to create the cartoon.
-
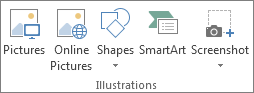
On the Insert tab, in the Illustrations group, click Shapes.
-
You can do any of the following on the Format tab, which appears afterward you insert a drawing shape:
-
Insert a shape. On the Format tab, in the Insert Shapes grouping, click a shape, and so click somewhere in the document.
-
Change a shape. Click the shape you desire to change. On the Format tab, in the Insert Shapes group, click Edit Shape, point to Modify Shape, and so choose a different shape.
-
Add text to a shape. Click the shape you where you want text, and and then blazon.
-
Group selected shapes. Select several shapes at a time by pressing CTRL on your keyboard and clicking each shape you want to include in the grouping. On the Format tab in the Suit group, click Group and then that all of the shapes volition be treated like a unmarried object.
-
Draw in the document. On the Format tab, in the Insert Shapes grouping, expand the shapes options by clicking the arrow. Nether Lines click Freeform or Scribble.
Tip:To stop cartoon with the Freeform or Scribble lines, double-click.
-
Adjust the size of the shapes. Select the shape or shapes y'all want to resize. On the Format tab, in the Size group, click the arrows or type new dimensions in the Peak and Width boxes.
-
Apply a style to a shape. In the Shape Styles grouping, balance your pointer over a style to see what your shape volition expect like when yous apply that style. Click the way to utilise it. Or, click Shape Fill or Shape Outline and select the options that you want.

Note:If you desire to utilise a color and gradient that aren't bachelor in the Shape Styles group, select the color outset, and and then utilize the gradient.
-
Add period charts with connectors. Before yous create a menses chart, add a drawing canvass past clicking the Insert tab, clicking Shapes in the Illustrations group, and then clicking New Drawing Sail. On the Format tab, in the Insert Shapes group, click a Flow chart shape. Under Lines, choose a connector line such equally the Curved Pointer Connector.
-
Use shadow and iii-dimensional (three-D) furnishings to add interest to the shapes in your drawing. On the Format tab, in the Shape Styles group, click Shape Effects, and choose an consequence.
-
Align the objects on the canvas. To align the objects, press and hold CTRL while y'all select the objects that you desire to marshal. On the Format tab, in the Arrange group, click Align to choose from an assortment of alignment commands.
-
Delete all or office of a cartoon
-
Select the drawing object that you want to delete.
-
Press DELETE.
See likewise
Add shapes
Depict a curve or circle shape
Insert pictures
Crop a picture
Add clip art to your file
What do you want to do?
-
Add a drawing to a certificate
-
Delete all or part of a drawing
Add together a drawing to a document
-
Click in your document where you desire to create the drawing.
-
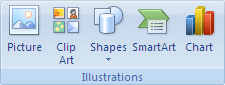
On the Insert tab, in the Illustrations grouping, click Shapes.
-
When you lot find the shape you desire to insert, double-click to insert it automatically, or click and elevate to draw information technology in your document.
Yous can do any of the following on the Format tab, which appears after you insert a cartoon shape:
-
Insert a shape. On the Format tab, in the Insert Shapes grouping, click a shape, and and so click somewhere in the document.
-
Change a shape. Click the shape you want to alter. On the Format tab, in the Shape Styles group, click Modify Shape, so choose a different shape.
-
Add text to a shape. Right-click the shape, click Add Text, then type.
-
Group selected shapes. Select several shapes at a fourth dimension past pressing CTRL on your keyboard and clicking each shape you want to include in the group. On the Format tab in the Adjust group, click Group and so that all of the shapes will exist treated like a single object.
-
Draw in the document. On the Format tab, in the Insert Shapes group, expand the shapes options by clicking the pointer. Under Lines click Freeform or Scribble.
-
Suit the size of the shapes. Select the shape or shapes you want to resize. On the Format tab, in the Size group, click the arrows or type new dimensions in the Shape Height and Shape Width boxes.
-
Apply a style to a shape. In the Shape Styles group, balance your arrow over a fashion to run into what your shape will look similar when you apply that style. Click the way to utilize it. Or, click Shape Fill or Shape Outline and select the options that you want.

Annotation:If yous want to apply a color and gradient that aren't available in the Shape Styles group, select the colour first, and then employ the gradient.
-
Add flow charts with connectors. Before you create a flow chart, add a drawing canvas past clicking the Insert tab, clicking Shapes in the Illustrations group, and and then clicking New Drawing Canvass. On the Format tab, in the Insert Shapes group, click a Flow chart shape. Nether Lines, choose a connector line such as the Curved Arrow Connector.
-
Use shadow and iii-dimensional (3-D) furnishings to add interest to the shapes in your drawing. On the Format tab, cull an pick in either the Shadow Effects or the three-D Furnishings grouping.
-
Align the objects on the sheet. To align the objects, printing and hold CTRL while you lot select the objects that you desire to align. On the Format tab, in the Arrange group, click Align to choose from an array of alignment commands.
-
Delete all or role of a drawing
-
Select the drawing object that you desire to delete.
-
Press DELETE.
Come across as well
Draw a curve or circle shape
Insert pictures
Crop a movie
Add together clip art to your file

Source: https://support.microsoft.com/en-us/office/add-a-drawing-to-a-document-348a8390-c32e-43d0-942c-b20ad11dea6f
Posted by: dotsonposelver.blogspot.com
0 Response to "How To Draw In Microsoft Word 2016"
Post a Comment